by
by What Are Some Beginner Nail Art Designs to Do at Home?
What Are Some Beginner Nail Art Designs to Do at Home? Nail art has evolved into a fascinating form of self-expression, with designs ranging from simple polka dots to intricate 3D art. It’s not just for professional salons anymore
you can easily create stunning designs right at home with a few basic tools, patience, and creativity. If you’re new to nail art, starting with easy designs can help you build confidence and improve your skills. This article will guide you through some beginner-friendly nail art ideas, tips, and answers to frequently asked questions about getting started with nail art at home.
Why Try Nail Art at Home?
Nail art allows you to personalize your look, enhance your nails, and showcase your creativity. Doing nail art at home has many advantages:
- Cost-effective: It saves you money that you would otherwise spend at a salon.
- Convenience: You can do it anytime that fits into your schedule without needing an appointment.
- Practice and progress:The more you practice, the better you get! You can experimen with designs and techniques to improve your skills
Now that you know the benefits, let’s dive into some beginner-friendly designs.
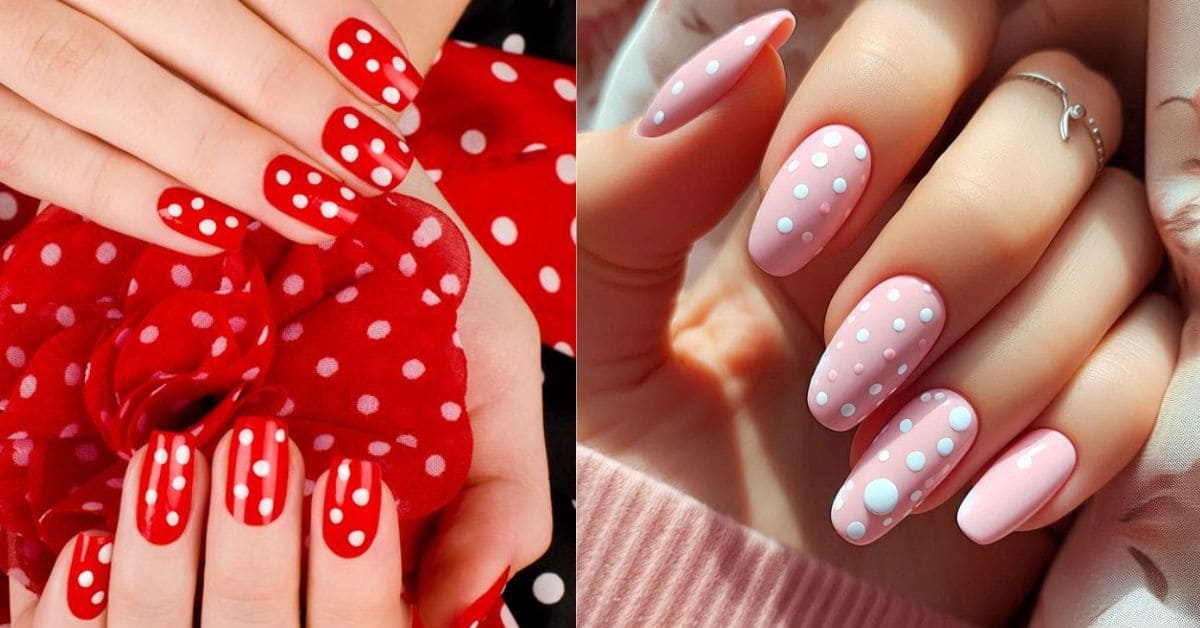
1.Polka Dots: A Fun and Easy Classic

Polka dots are one of the most popular and simplest nail art designs. You don’t need any fancy tools; a toothpick, a bobby pin, or a dotting tool will do the trick. Here’s how to create polka dot nails:
How to Do It:
- Apply a base coat to protect your natural nails and prevent staining.
- Paint your nails with a base color (lighter shades work well with darker polka dots and vice versa).
- Dip the tip of a toothpick or bobby pin into your chosen polish color.
- Gently dot the polish onto your nails. You can either do a random pattern or create a more structured look with evenly spaced dots.
- Finish with a top coat to seal in the design and add shine.
Pro Tip: If you’re feeling adventurous, try multi-colored polka dots for a fun, playful vibe
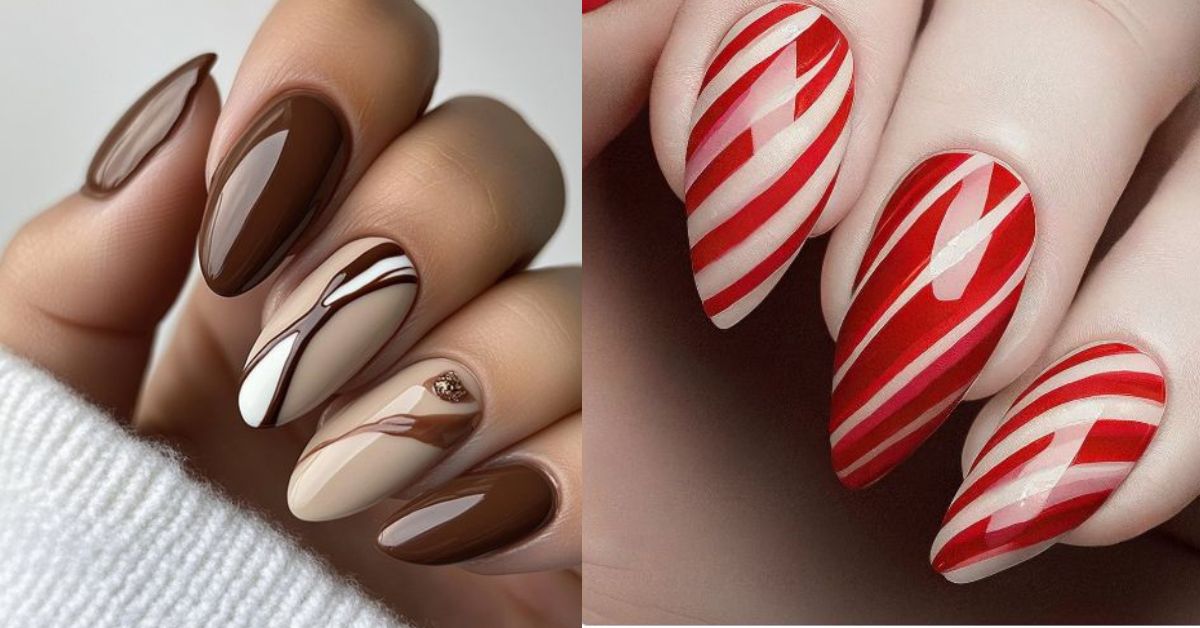
2.Stripes: Sleek and Simple
Stripes are elegant and versatile. They can be vertical, horizontal, or diagonal, and you can make them as thin or thick as you like. This design requires a steady hand or striping tape to create clean lines.
**How to Do It:**
- Start with a base coat and let it dry.
- Paint your nails with a base color.
- Once the base is dry, use striping tape or a nail art brush to create your stripes. For beginners, horizontal or vertical stripes are easier to achieve.
- Apply your second color over the taped areas.
- Carefully remove the tape while the polish is still wet to reveal crisp lines.
- Seal the design with a top coat for extra shine and protection.
**Pro Tip:** For a modern look, try using metallic polish for the stripes.
3.Accent Nails: Keep It Simple Yet Stylish
If you’re hesitant about creating designs on all your nails, try focusing on just one or two “accent nails.” This method allows you to add a little flair without feeling overwhelmed by doing intricate designs on each finger.
**How to Do It:**
- Paint all of your nails with a solid color except one (usually the ring finger).
- Use a contrasting color on your accent nail and add a simple design like polka dots, stripes, or even glitter.
- Finish with a top coat.
**Pro Tip:** This style works well with minimal effort but still creates a professional, polished look.
4 .Ombré Nails: A Gradient of Gorgeousness
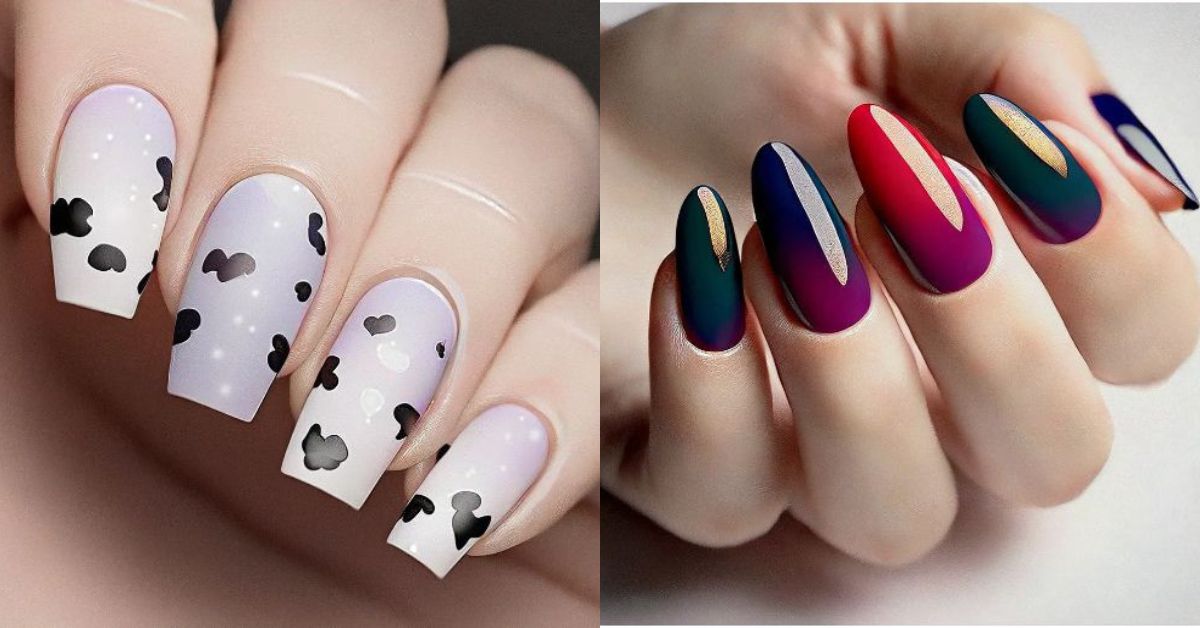
Ombré nails involve blending two or more colors to create a gradient effect. This design is slightly more advanced, but with practice, you can master it. A makeup sponge is the key tool for this technique.
How to Do It:
- Start with a base coat and apply a light color to your nails.
- On a makeup sponge, paint stripes of two or three nail polish colors.
- Dab the sponge onto your nails, blending the colors to create a gradient effect.
- Repeat as necessary to build up the colors, and clean up any excess polish around your nails with a cotton swab and nail polish remover.
- Apply a top coat to smooth the finish and add shine.
**Pro Tip:** Use colors from the same family (e.g., pastels or shades of blue) for a soft, cohesive look.
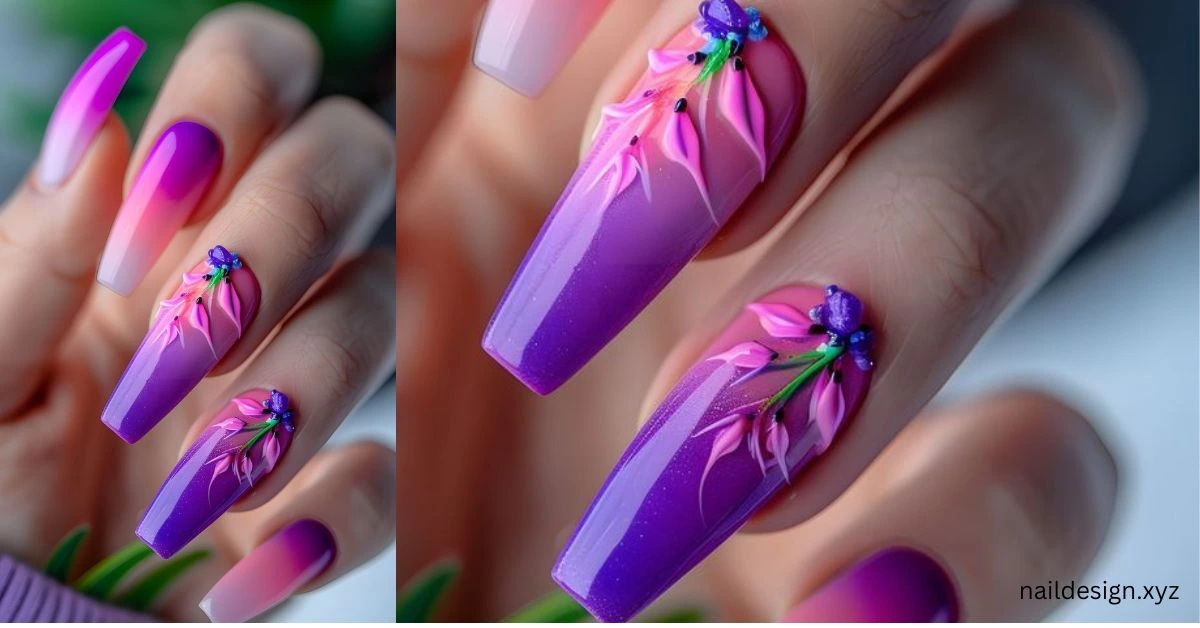
5.Floral Nail Art: Delicate and Feminine
Floral designs may look complicated, but they can be quite easy to achieve with the right technique. A small dotting tool or a fine brush is all you need to create flowers on your nails.
How to Do It:
- After applying a base coat and base color, use a dotting tool to create five small dots in a circular pattern for the petals.
- Place a contrasting dot in the center to form the middle of the flower.
- You can add leaves by using a thin brush to draw small lines around the flowers.
- Once the design is dry, finish with a top coat.
**Pro Tip:** Start with one or two flowers on your nails to keep the design simple and easy to execute.
6.Glitter Gradient: Sparkly and Glamorous
A glitter gradient is a fantastic way to add some sparkle without covering your entire nail. It’s easy to do and looks stunning for both casual and special occasions.
How to Do It
- Paint your nails with a base color.
- Using a glitter polish, apply it starting from the tip of your nail and drag it halfway down, using less glitter as you move toward the base.
- This creates a natural gradient effect. Let it dry, and then add a top coat.
**Pro Tip:** Try using different colors of glitter for a more dramatic effect!
7.Negative Space: Minimalist Yet Chic
Negative space nail art is trendy and sophisticated. This design involves leaving parts of your nail bare while painting or designing around it. It’s perfect for beginners because it doesn’t require covering the entire nail.
How to Do It:
- Apply a clear base coat.
- Use tape or a nail stencil to section off areas of your nails that you want to remain bare.
- Paint the exposed areas with your chosen color, then remove the tape or stencil.
- Add a top coat to seal the design.
**Pro Tip:** For a bold look, use geometric shapes like triangles or squares to create interesting patterns.
Essential Tools for Beginner Nail Art
To create these designs at home, you’ll need a few basic tools:
Base coat and top coat: These protect your nails and prolong your design.
Dotting tool or toothpick: For creating polka dots and floral designs.
Nail art brushes or striping brushes: For detailed work like stripes or flowers.
Striping tape: To create clean lines and geometric designs.
Makeup sponges: For gradient or ombré effects.
Cotton swabs and nail polish remover: For cleaning up any mistakes.
With these tools in hand, you’re ready to start creating beautiful designs right from the comfort of your home!
FAQs About Nail Art for Beginners
1. What’s the easiest nail art design for beginners?
Polka dots are arguably the easiest design for beginners. You don’t need any special tools — just a toothpick or bobby pin to create dots on your nails. It’s a forgiving design that still looks professional.
2. Can I use household items for nail art tools?
Yes! Many household items can double as nail art tools. For example, a toothpick or bobby pin can be used for dotting, and tape can help you create stripes or geometric patterns.
3. How long does nail art last?
With a good top coat, your nail art can last anywhere from 5-10 days. However, this can vary depending on your daily activities, how often you wash your hands, and the quality of the products used.
4. What type of polish is best for nail art?
Any regular nail polish works well for most designs. However, fast-drying polishes are great for layering, and gel polishes provide a long-lasting finish.
5. How can I remove nail art without damaging my nails?
To remove nail art, soak a cotton ball in nail polish remover, place it on your nail, and wrap it in foil for a few minutes. This helps the polish come off easily without too much scrubbing.
6. Can I do nail art on short nails?
Absolutely! Nail art can look great on nails of any length. For short nails, simpler designs like dots, stripes, or negative space art are ideal, as they don’t require a lot of surface area.
7. How do I fix a mistake in my nail art?
If you make a small mistake, you can use a fine brush dipped in nail polish remover to clean it up. For bigger errors, you may need to remove the design from that nail and start over. Patience is key!
conclusion
What Are Some Beginner Nail Art Designs to Do at Home? nail art at home is a fun, creative, and affordable way to express yourself. Whether you’re into simple designs like polka dots or more advanced techniques like ombré or floral patterns, there’s something for everyone. With a bit of practice, you’ll be able to create salon-worthy nails right in your own home. So, grab your nail polish and tools, and let your creativity flow!